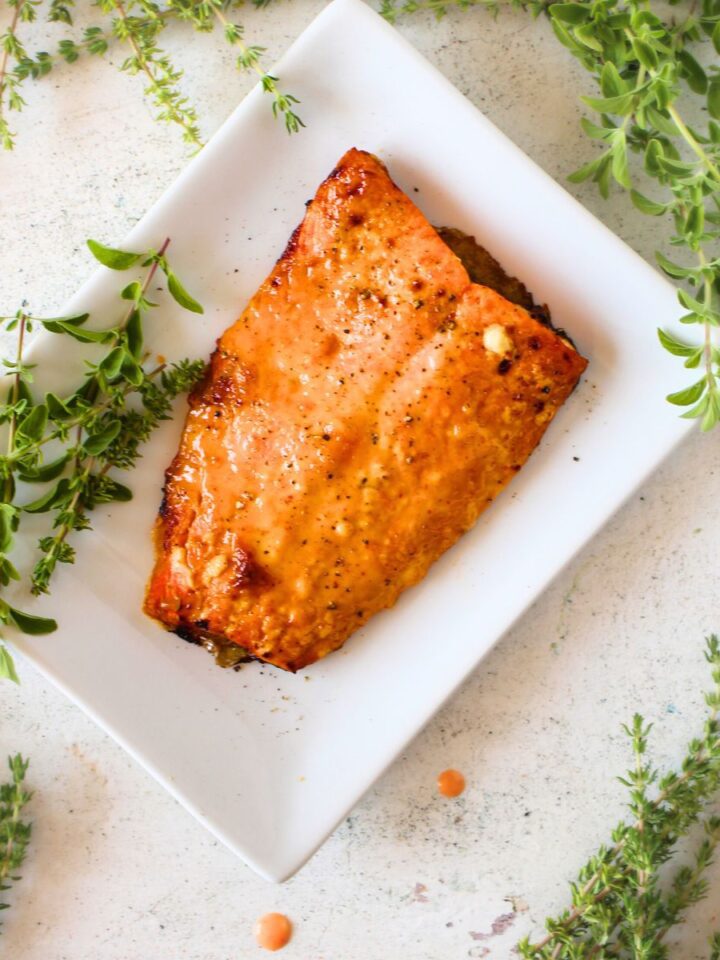
If you’re looking for a weeknight dinner that tastes indulgent but takes almost zero effort, these 2-Ingredient Crispy Air Fryer Chicken Thighs will be your new obsession. This simple, foolproof technique—adapted from America’s Test Kitchen—gives you shatteringly crisp skin and juicy meat with nothing more than chicken and salt. It’s the kind of recipe that makes you wonder why you ever bothered with complicated marinades or long oven times.

America's Test Kitchen Thighs
If you're looking to crank out restaurant-quality chicken thighs at home with minimal fuss, this approach, inspired by America’s Test Kitchen’s Air-Fryer Roasted Chicken Thighs with Old Bay Seasoning, offers exactly that.
The method uses bone-in, skin-on thighs seasoned with a savoury mix, cooked in an air fryer until the skin is golden-crisp and the meat juicy. Below is a streamlined walkthrough along with key pointers for getting skin that crackles, and an important technique you might not instinctively think of: poking holes in the skin.
How to Make This Easy 2-Ingredient Chicken Recipe
- Prepare the chicken thighs: Start with bone-in, skin-on chicken thighs. Pat them very dry with paper towels—moisture is the enemy of crisp skin.
- Season the thighs: Use Old Bay or any other seasoning blend or your preferred mix. Make sure the seasoning covers the skin side and under any folds.

- Poke holes in the skin: Using the tip of a sharp knife or a skewer, gently pierce the chicken skin in a few spots. This helps render the fat and prevent steam from forming under the skin (more on why this is crucial below).
- Let them rest (optional but helpful): If time allows, let the seasoned thighs sit uncovered in the refrigerator for 30 minutes or up to a few hours. This helps dry out the skin further and improves crisping.
- Preheat your air fryer: Get your air fryer hot (typically around 375-400 °F) so the thighs start crisping immediately.
- Air-fry the thighs: Place the chicken thighs skin-side up in the air fryer basket, ensuring they’re not crowded. Cook for approximately 20–25 minutes (depending on thigh size and air fryer model), flipping once if needed, until the internal temperature hits at least 165 °F and the skin is deeply golden and crisp.
- Finish and rest: Let the thighs rest for 5 minutes before serving. This allows the juices to redistribute. Serve with your favourite sides—such as Easy Keto Coconut Riced Cauliflower, Keto Maple Bacon Broccoli Salad or Low Carb Black Soybeans.
Why Poke Holes in the Skin?
That little step of poking holes in the skin makes a surprising difference. Here’s why it matters:
- Allows fat to render: Skin-on thighs have a layer of fat underneath. When the air fryer heats that fat, it melts and helps cook the skin from beneath. But if the fat has no escape route, steam can build up and keep the skin soggy instead of crisp.
- Prevents steam-pocketing: If the skin is sealed too tightly, the fat starts to melt, and the moisture gets trapped, creating steam that opposes crisping. Piercing the skin gives an escape path for moisture and melted fat.
- Improves contact with hot air: As the fat renders away, the skin gets thinner and closer to the hot air circulation, helping it dry and crisp more effectively.
- Promotes uniform browning: Small holes allow heat to penetrate more evenly across the underside of the skin, reducing the risk of under-cooked or rubbery patches.

In short: if you skip the poking step, you risk ending up with chicken thighs that are juicy but whose skin is limp or gummy—whereas with proper piercing, you’re far more likely to get that satisfying “crunch” and beautifully browned finish.
Tips for Extra Crispy Air Fryer Chicken Thighs
- Start with really dry skin: Pat the thighs thoroughly with paper towels. For best results, let them air-dry uncovered in the fridge for 30 minutes or more.
- Don’t overcrowd the basket: Leave space around each thigh so hot air can circulate freely. Crowding reduces airflow and leads to soggy spots.
- Use light oil: A thin coating of oil helps transfer heat and promotes browning. But too much oil will create excess dripping and potential smoke.
- High temperature at the start: Begin with a hotter air-fryer setting so the skin begins to crisp immediately. If your device allows, start at 400–425 °F for the first few minutes, then reduce to 375–400 °F for the remainder.
- Flip if required: Some air fryers cook unevenly at the bottom. If you notice browning only on top, flip the thighs halfway.
- Let them rest: Once done, allow the thighs to sit for a few minutes before serving. The skin will firm up, and the juices settle, giving a better texture.
- Serve immediately: Skin begins to soften as it cools and moisture re-accumulates. For the best texture, serve while still warm.

Why This Quick Weeknight Chicken Dinner Works So Well
The approach from America’s Test Kitchen leverages the key benefits of skin-on, bone-in thighs: the bone adds flavour and helps distribute heat more evenly; the skin acts as a natural “lid” that keeps moisture in while the high-heat air fryer promotes crisping on the outside. The air fryer mimics the effect of a broiler or a crisping pan but with more even heat and less risk of burning or drying out the meat. By combining proper seasoning, adequate drying, and piercing the skin to enable fat rendering, you end up with poultry that is juicy inside, crisp on the outside, and full of flavour.
Budget-Friendly Air Fryer Meal Final Thoughts
If you’ve ever struggled with chicken thighs that looked nice but ended up with soggy skin or over-done meat, this method offers a reliable fix. The bold keywords for better texture and flavour are: dry skin, pierced skin, high heat, air circulation, and seasoning. Using the steps above, you’ll elevate a simple weeknight meal into a crisp-skinned, juicy, flavorful main that can rival restaurant fare.
So next time you grab bone-in, skin-on chicken thighs, try this air-fryer approach inspired by America’s Test Kitchen—and don’t forget to poke those holes in the skin. Your dinner (and your diners) will thank you.

More Quick Weeknight Chicken Dinner Ideas


More Budget-Friendly Air Fryer Meal Ideas


2-Ingredient Crispy Air Fryer Chicken Thighs - Inspired by the America’s Test Kitchen Recipe
If you’re looking for a weeknight dinner that tastes indulgent but takes almost zero effort, these 2-Ingredient Crispy Air Fryer Chicken Thighs will be your new obsession. This simple, foolproof technique—adapted from America’s Test Kitchen—gives you shatteringly crisp skin and juicy meat with nothing more than chicken and salt. It’s the kind of recipe that makes you wonder why you ever bothered with complicated marinades or long oven times.
- Total Time: 25 minutes
- Yield: 4 servings 1x
Ingredients
- 4 (5-7 oz) bone-in chicken thighs, trimmed
- 4 tsp Old Bay Seasoning
Instructions
- Poke the skin side of each thigh 10 to 15 times with a metal skewer. Pat chicken dry with paper towels, then sprinkle all over with Old Bay
- Arrange chicken thighs skin side up in the air-fryer basket, spaced evenly apart. Place the basket in air fryer and set the temperature to 375 -400 degrees.
- Cook until skin is well browned and crisp and chicken registers at least 185 degrees, 20 to 25 minutes, rotating chicken halfway through cooking (do not flip).
- Transfer chicken to a large plate and let it rest for 5 minutes. Serve
- Prep Time: 5 minutes
- Cook Time: 20 minutes
- Category: Dinner
- Method: Air Fryer
- Cuisine: Keto, sugar-free, low carb
- Diet: Gluten Free
Nutrition
- Serving Size: 1 cooked chicken thigh
- Calories: 313
- Sugar: 0
- Fat: 17
- Carbohydrates: 0
- Fiber: 0
- Protein: 27

Leave a Reply